MEDICAL GOLFMitz Conditioning Gym · Higashi-Osaka

Your Updated Menu

Thank you for coming in on October 1.

Here is a video recap of our session with English subtitles: what to keep in mind day to day and during your exercises.

7:53

Start here

Video recap of October 1 (English subtitles)

I explain what to keep in mind day to day and in your exercises. Please watch this before you start the menu.

  • Let your breastbone sink down. Lift from the upper back, not the lower back.
  • Squeeze a ball with your inner thighs and lift the bottom of your pelvis, so your thighs and core connect.
  • In the dead bug, keep your knees closer together.
  • Your ankles aren't really stiff: bring your chest down as you squat.
  • Single-leg RDL: 5 or 10 reps here and there teaches your glute to do the work.
Watch the recap7:53

Below is your updated menu, in this order. Think of it as your warm-up before training.

  1. 1MobilityOpen your chest and get your shoulder blades moving.
  2. 2Release & ActivateLoosen the front thigh, then switch on your back and shoulder blades.
  3. 3Glutes & coreSwitch on the deep glute and your core.
  4. 4MovementTake it onto your feet.

Every session, do this menu first (1 → 2 → 3 → 4) as your warm-up, then your training.

Step 1

Mobility

Open your chest and let your shoulder blades move, with your core on.

1Chest and shoulder blades

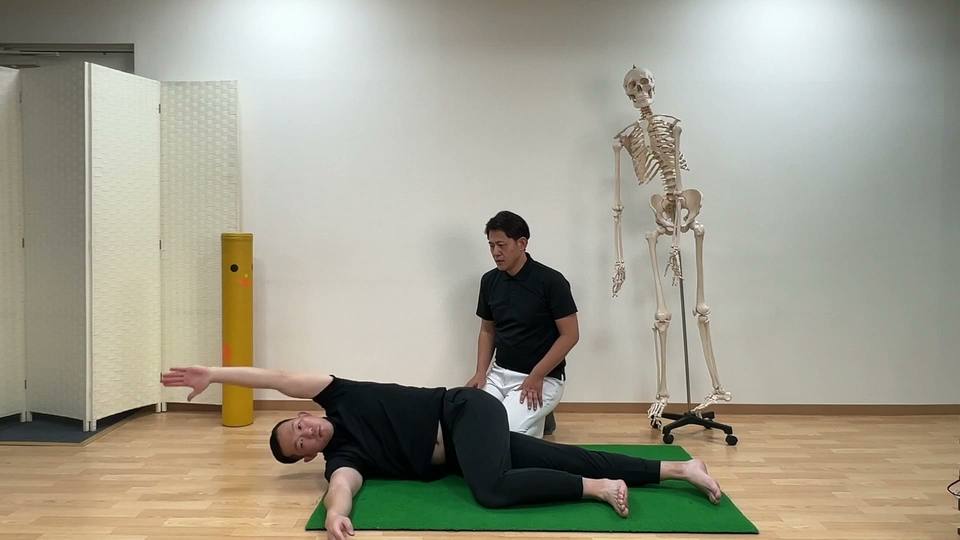
Side-lying chest rotation (90-90)

Dose5 slow reps each side

How

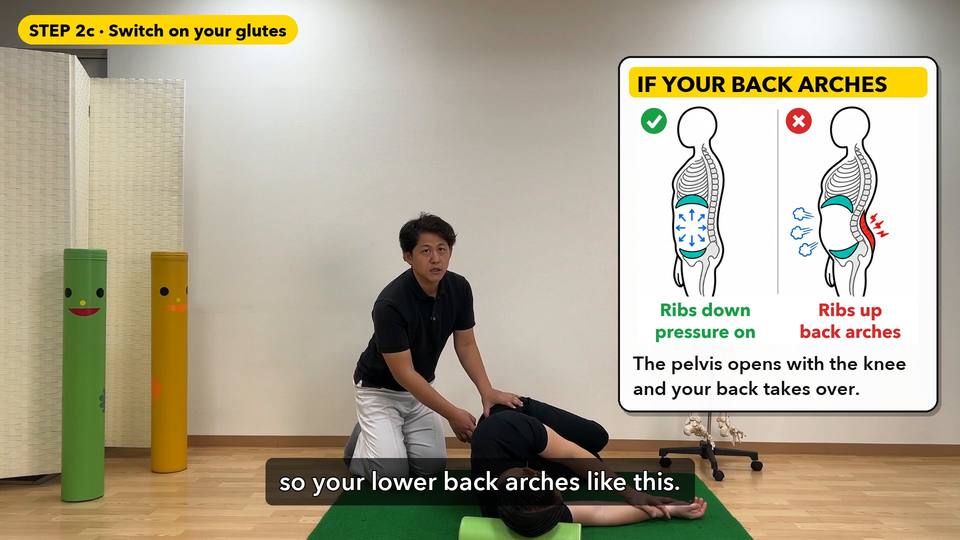
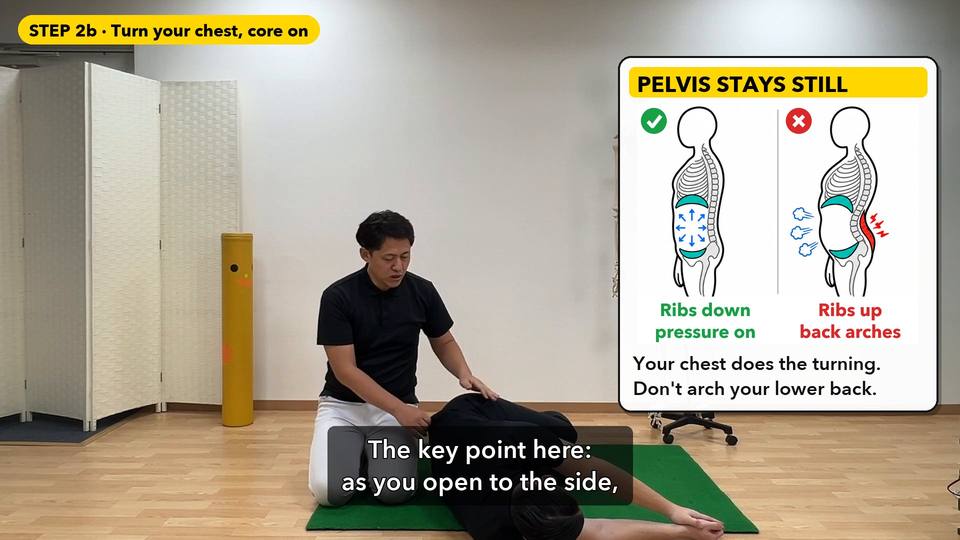
Lie on your side with hips and knees at 90°, and hold the top knee down with your lower hand. The video shows it without a ball; add one: squeeze a small ball or folded towel between your knees the whole time. That keeps your inner thighs and core on while your chest turns. Draw your lower belly in and curl your pelvis slightly. Open your top arm behind you, eyes following your hand. At the open position take one slow breath in and out. Then breathe out, let your ribs close, and bring the arm back, leading from under your armpit. Open only as far as your top knee stays pressed down and your lower back stays still; your hand doesn’t need to reach the floor. Your pelvis stays still; your chest does the turning.

Arm circle (side-lying)

Dose5 slow circles each side

How

Lie on your side, top hip and knee at about 90°, bottom leg straight. Bending the hip more than 90° tends to pinch it. Reach your arms forward first, then circle the top arm back. Start the reach from your shoulder blade, not just the tip of your shoulder. Follow your index finger with your eyes and let your thumb turn slightly back. Once the arm is behind you, let your shoulder blade draw down: you should feel your chest stretch and your back squeeze in. Don't arch your lower back: gently tuck your pelvis and draw in your belly and the bottom of your pelvis. If your knee lifts off the floor because you're stiff, put a cushion under it.

Step 2

Release & Activate

Loosen the front and outer thigh so your pelvis isn't pulled forward, then switch on your back and shoulder blades.

2Front and outer thigh, then shoulder blades

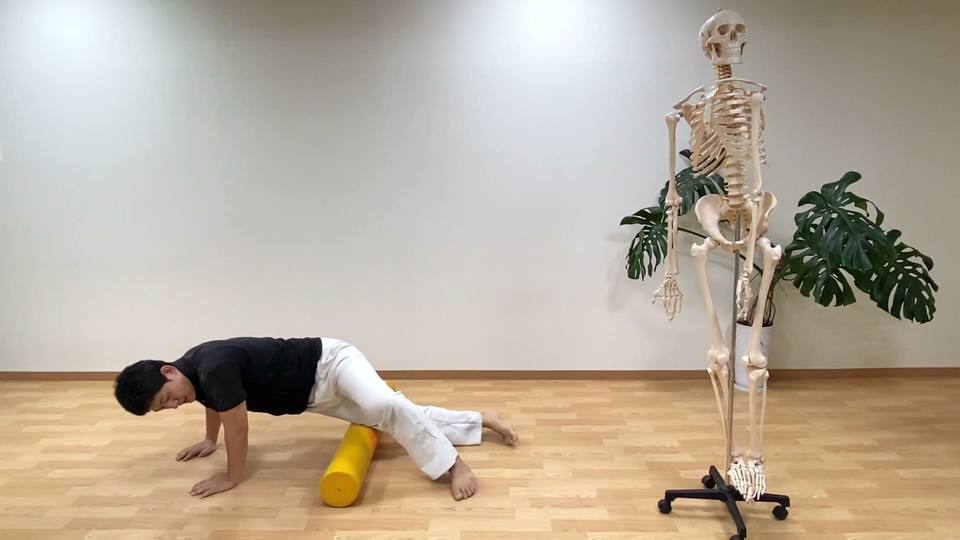
Front-thigh release with a foam roller

Dose3 lines × about 3 passes, each leg

How

March in place first and notice how heavy your legs feel. Lie on the roller and roll from just below the rim of your pelvis down to beside the kneecap, in three lines: the side, slightly to the front, and straight in front. Start high, right under the pelvis, and keep the strokes big. For the side, step your top leg forward for support. For the front, use the edge of the roller so your body hangs slightly to the side. If you find a tight spot, roll over it lightly 2 or 3 more times. March again afterwards: your legs should feel lighter.

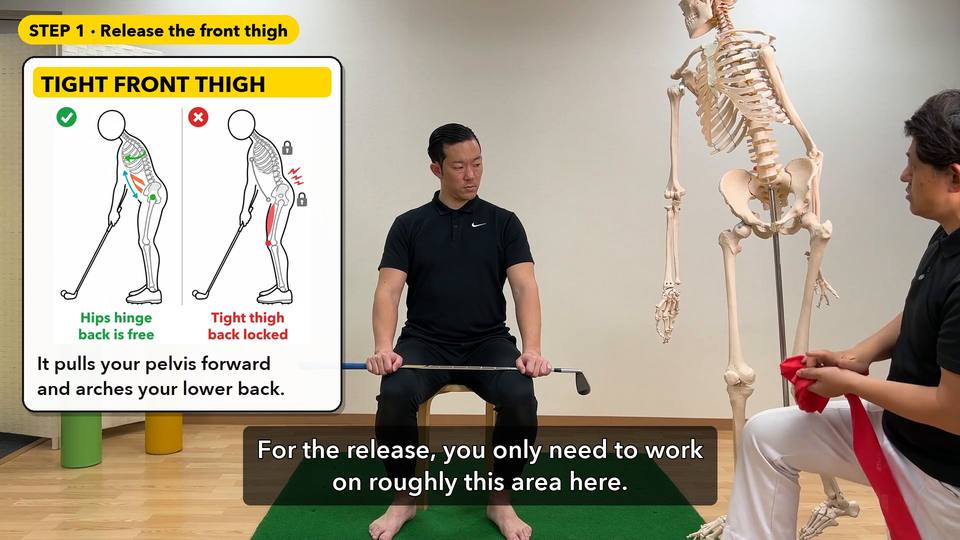
Front thigh release (rectus femoris) with a golf club

Dose1–2 spots per leg, 2–3 slow slides each

How

Sit and place a golf club shaft just below the bony point at the front of your hip. Press straight down with moderate pressure, about 2–3 kg; no need to crush the muscle. Keep the pressure and slide it about 3 cm toward your knee. One or two spots are enough. You can lean in from your hips to add weight, but keep your ribs down and don't arch your lower back to press harder.

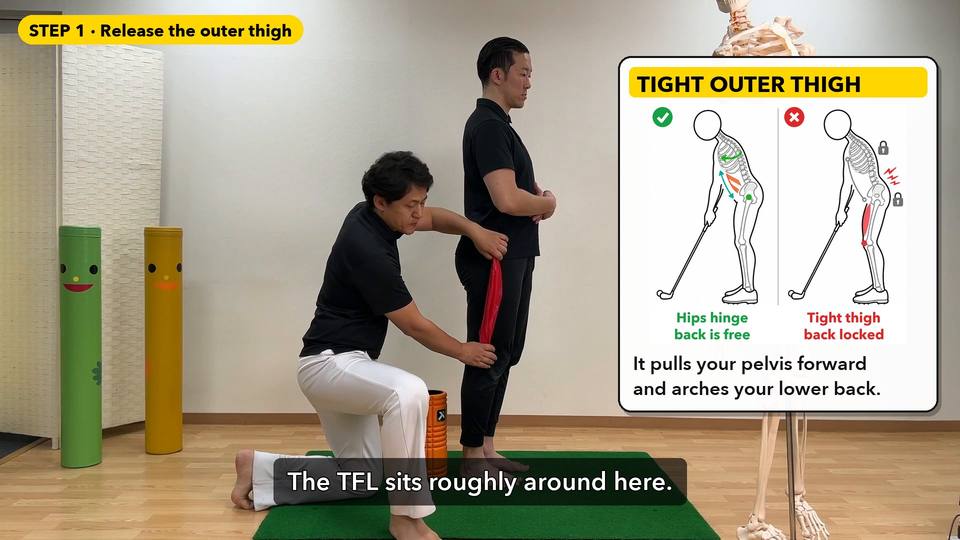
Outer thigh release (TFL) with a foam roller

Dose3 lines × about 3 passes, each leg

How

Lie on your side on the roller. Roll the full length, from just above the knee up to the rim of your pelvis, along three lines: the side, slightly toward the front, and almost the front. Support yourself with your top hand and foot, and keep your belly lightly in so your lower back doesn't sag. The pressure should be strong but bearable. If you catch yourself holding your breath or tensing your back, take more weight onto your top foot. Check before and after: stand and lift your knee. The released side should lift more easily.

YTWL (shoulder blades)

Dose5 slow rounds of Y → T → W → L

How

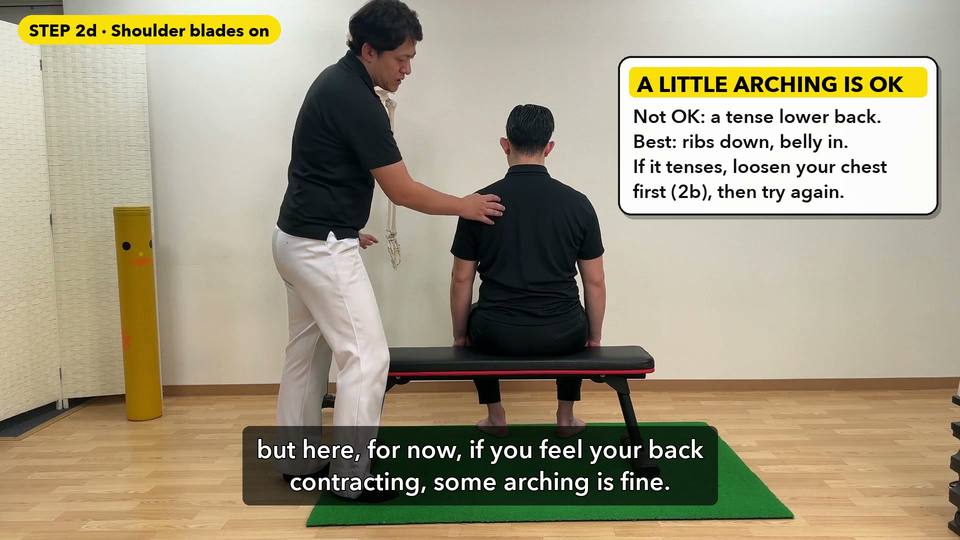
Best of all is when you feel it in your lower trapezius: the lower part of the muscle between and below your shoulder blades. For now, do this instead of the prone T raise on your list: it switches on your back and shoulder blades with less risk of arching and straining your lower back. Sit on a bench or chair, feet flat, and set the pressure position: ribs down, pelvis level. Y: arms overhead, elbows straight. T: arms out to the sides, a little below shoulder height, thumbs and elbow creases turned out. W: elbows bent, thumbs pointing back, shoulder blades together. L: shoulders and elbows drawn back, elbows bent at 90°, thumbs turned out. In every letter, turn your upper arm out and let your shoulders drop, so your shoulder blades draw together and down. You should feel it around your shoulder blades, especially their lower part, not the tops of your shoulders. A little arching of your lower back is fine as long as you feel your back working (the video says so at 4:38), but tension in your lower back is not OK. Ideally, hold the pressure position throughout: belly drawn in, ribs down. If your lower back tenses up too much instead of your back doing the work, that points to tightness at the front of your chest: go back to the side-lying chest rotation (90-90) in Step 1, then try again. If your shoulders or neck tense up, go back to stretching first (for example, the pec minor stretch on your list), then try again. If your lower back hurts, set the YTWL aside for now, as the video says. If your shoulder hurts, set it aside too and let me know.
Step 3

Glutes & core

Switch on the deep glute that holds your pelvis, then your core.

3Deep glute and core

Clamshell

Dose10–15 each side × 2

How

On your side, head on a pillow or your arm. Bend your hips so your knees sit a hand-width below the level of your belly button, heels together. Draw your belly and pelvic floor in and roll your pelvis slightly under, belly button facing straight ahead. Open the top knee about 45° and no more. Feel it deep in the lower glute or the back of the thigh (your belly working is fine too), not in the outer thigh or your lower back.

Dead bug heel tap

Dose5 each side, slowly

How

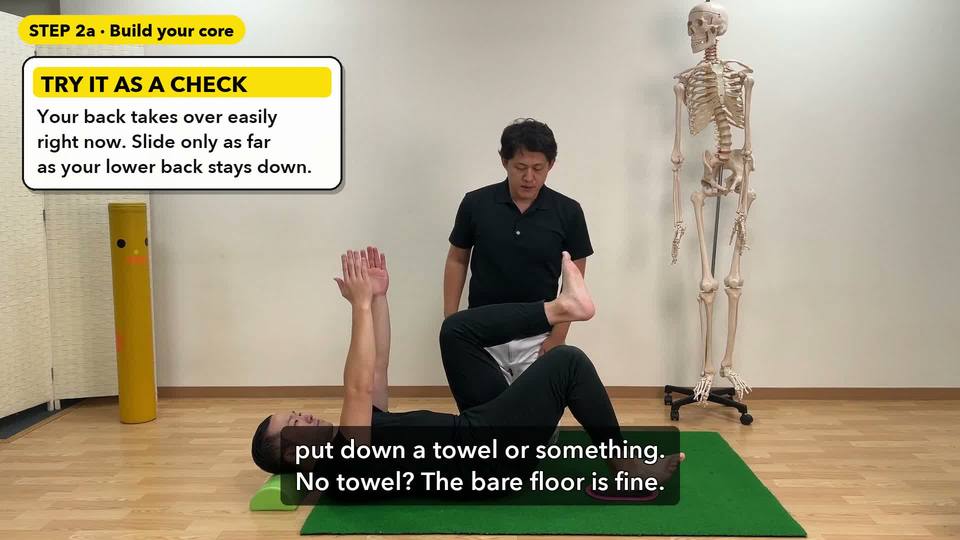
On your back, lift your knees to about belly-button height, hips and knees at 90°, arms straight up in front. Keep the back of your ribs and your lower back on the floor. Lower one heel to tap the floor over 4 counts and bring it back over 4 counts, then the other side. You should feel your belly holding you the whole time. If your shoulders tense, drop them and reset your breath. If you feel the front of your thigh, your back has arched: roll your pelvis under again. The heel slide from 1:26 straightens the leg. You may try it as a check. Right now two things tend to happen. Your lower back starts to lift partway through. And as the leg straightens, your still-tight front thigh pulls your pelvis forward and arches your back. Slide only as far as your lower back stays down, and stop there. Keep your knees a little closer together than feels natural, even close enough to touch (same side or crossed is fine).

Optional: try it as a check

Dead bug (opposite arm and leg)

Dose2–3 each side, slowly

How

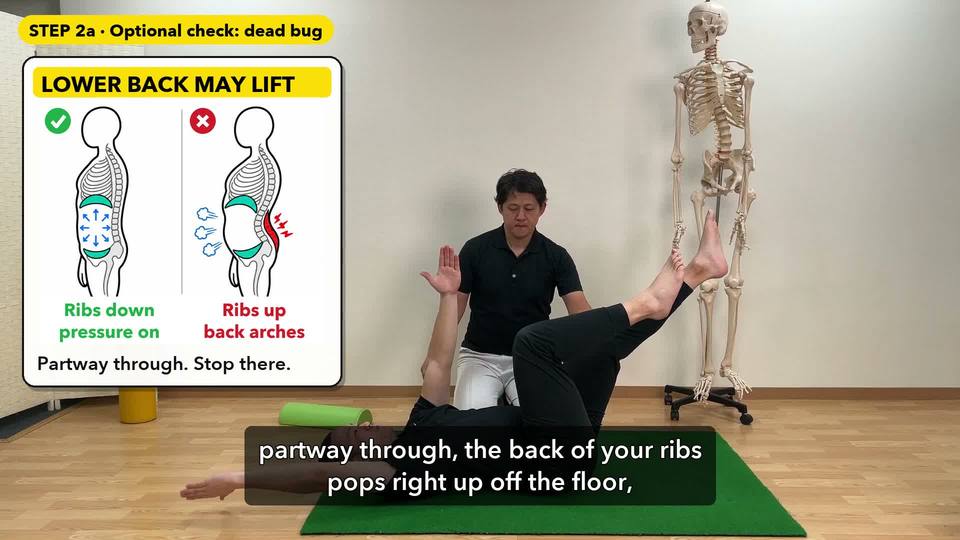
This one is a check, not one of your main exercises. Try it after the heel tap, in the same setup: knees at belly-button height, arms straight up toward the ceiling, the back of your ribs and your lower back flat on the floor. If your chin tips up, put a pillow under your head. Breathe in lightly. As you breathe out slowly, reach your right arm overhead and straighten your left leg out. Bring them back slowly, then do the other side. Right now two things tend to happen. Your lower back starts to lift partway through. And as the leg straightens, your still-tight front thigh pulls your pelvis forward and arches your back. When your lower back or the back of your ribs starts to lift, stop at that point and bring your arm and leg back. If that happens, it only means the front-thigh releases in Step 2 and the heel tap still need time. Keep your knees a little closer together than feels natural, even close enough to touch (same side or crossed is fine).

Wall hip lift (breathing into the pressure position)

Dose5 slow breaths × 2

How

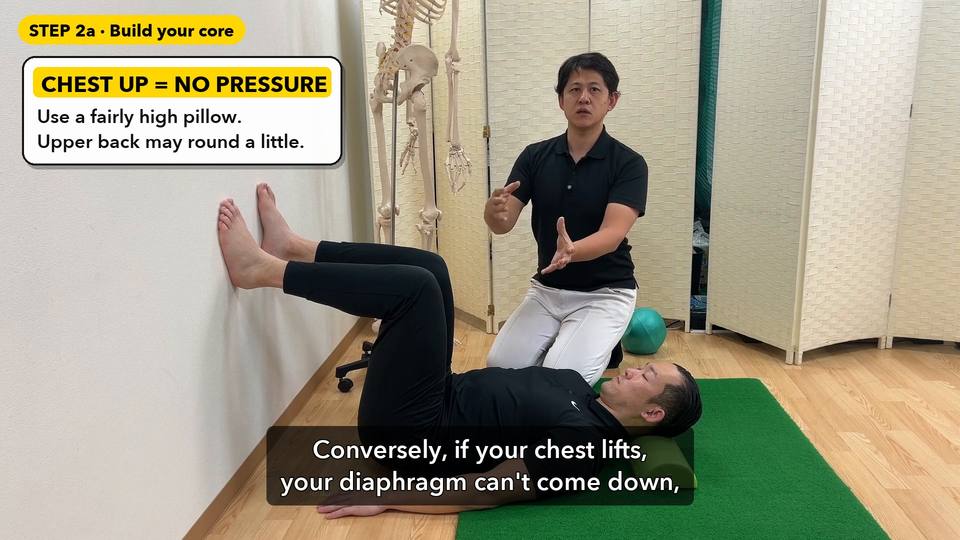
This is the Medical Golf version of the 90/90 hip lift on your list; do this one instead. Put a fairly high pillow under your head; it's fine if your upper back rounds a little. Squeeze a small ball between your knees; it helps your belly switch on (the video adds it at 4:20). Feet flat on the wall, hips and knees at 90°. Reach both arms toward the ceiling. Breathe in, then breathe out long and slow until your chest settles down. At the end of the breath out, gently squeeze and lift your pelvic floor, and curl your tailbone just off the floor. This is not a bridge; the tailbone only floats. Don't puff your chest or lift your chin. You should feel the back of your thighs and your belly working.

Hip lift

Dose10 reps, 3-second hold at the top, × 2

How

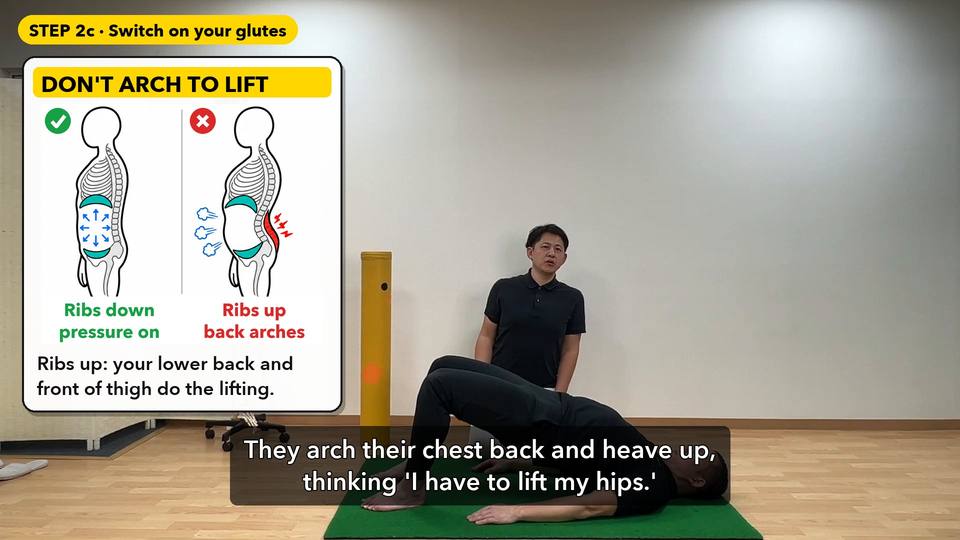
Knees and feet one to two fists apart. Ribs down first, then roll your pelvis under, then lift only one to one-and-a-half fists high. You should feel your glutes and the top of your hamstrings, not your lower back or the front of your thighs. This replaces the glute bridge on your list.

Step 4

Movement

Take that position onto your feet.

4On one leg

Single-leg Romanian deadlift

Dose6 each side × 2 (with a dumbbell, 3–5 kg is plenty)

How

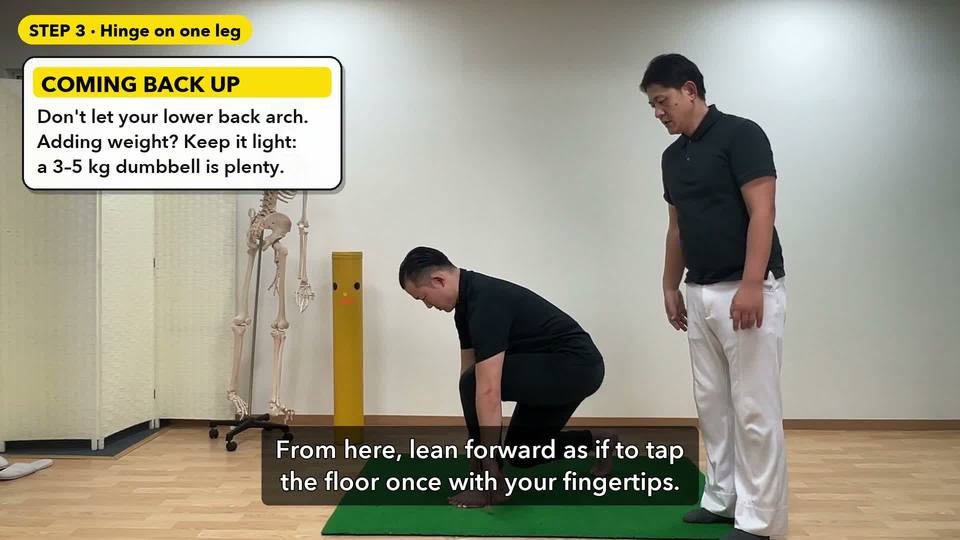
Front foot on the floor with about 90% of your weight on it. Your back foot can stay on the floor at first, but aim to support yourself so well that it could float. Keep your chest (breastbone) down, draw in your belly and the bottom of your pelvis, and move up and down with the glute of your front leg. Bend forward from the hip, front shin vertical, and reach only as far as your ribs stay down and your back doesn't arch. Come back up by pushing through your front heel and glute; don't arch your lower back on the way up. You should feel it in the glute and back of the front leg, not the front of the thigh or your lower back. Even 5 or 10 reps here and there during the day help your body learn that this is the muscle to use.

Rules

  1. Same order every session: 1 → 2 → 3 → 4, then your training.

  2. Quality over numbers. Stop the set as soon as your ribs flare open or your lower back arches or tenses.

  3. The doses are a starting point. Once a set feels easy and your form holds, you may add reps or sets on your own.

  4. If an exercise brings on pain in your neck or lower back, you're using it the wrong way: set it aside for that day and let me know.

  5. In your exercises and when you sit up straight, let your breastbone sink softly down and tuck your chin a little. Lift from the upper back just below your neck, not from your lower back.

  6. In the dead bug, keep your knees a little closer than feels natural, even close enough to touch.

  7. Your ankles aren't really stiff. When squatting, putting something under your heels is fine for now; bring your chest down as you lower yourself.

Next session

See you at your next session.